| View previous topic :: View next topic |
| Author |
Message |
LittleBlue
3rd gear

Joined: 08 May 2011
Posts: 71
Location: South Gippsland, Victoria.
|
 Posted: Wed Mar 05, 2014 8:29 pm Post subject: Little Blue's Big Makeover Posted: Wed Mar 05, 2014 8:29 pm Post subject: Little Blue's Big Makeover |
 |
|
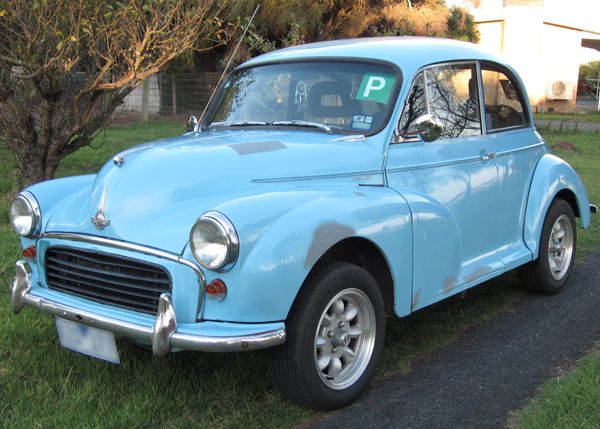
I've made this thread to record the makeover of my Morry, Little Blue.
She is not too bad overall, but her bad paint job is peeling and each panel has some rust... some have quite a bit. She needs a few dints straightened out, and a new paint job, all of which I am hoping to be able to do at home.
Seeing as she is my everyday car, I am working on her panel by panel over the weekends and when I have time off, to keep her drivable. I realise this makes it a lot more difficult, but that's the way it has to be.
Dad will be helping me a lot, at least until I'm competent. He's no expert, but is very handy!
I would really appreciate any comments and advice, including constructive criticism, as I want to do this as best as I can.
 [/img] [/img]
|
|
| Back to top |
|
LittleBlue
3rd gear
Joined: 08 May 2011
Posts: 71
Location: South Gippsland, Victoria.
|
| Posted: Wed Mar 05, 2014 8:44 pm Post subject: |
|
|
We started on the boot lid this week. This was the rustiest panel, and was so bad we considered replacing it, but decided that if we could fix this then we could fix anything! So far we've chopped out the rust on the outer skin, and cut the pieces to weld into place. Tried using my new Cigweld MIG welder using the gas-less option, but it just blew through and made a mess. We now have the gas, regulator, and the correct wire, so should be able to get this finished soon.
We left bridges in between each chunk that was cut out, just to hold it all in shape. Is this a good thing to do, or not needed? I think the idea was to chop these out later on, once these holes have the new metal in them, and then work on those. I'm just worried about the panel warping. Any advice would be great.
 [img] [img]
 [/img] [/img]
|
|
| Back to top |
|
John Ballard
valued contributor

Joined: 11 Feb 2004
Posts: 2646
Location: Dubbo NSW
|
| Posted: Thu Mar 06, 2014 7:12 am Post subject: |
|
|
Car looks great. You can buy the inner and outer boot lid bottom about 100mm wide. UK best source East Sussex Minors or Bull Motif.
Rubber boot lid seals are best with the one on the car not the boot lid.
|
|
| Back to top |
|
jimmy_d
Full Licence
Joined: 29 Aug 2009
Posts: 322
Location: Melbourne eastern suburbs
|
| Posted: Thu Mar 06, 2014 7:29 pm Post subject: |
|
|
| Unfortunately,some degree of heat distortion from the welding process will be unavoidable,even the best welders suffer from this.Basically,just take it slowly and dont weld to much in one place at the same time,lots of little tack welds are often better,move around to different locations to help keep the heat down and allow it to cool.Good luck,its all a learning process.
|
|
| Back to top |
|
DON58VAN
Full Licence
Joined: 25 Sep 2008
Posts: 863
Location: Sydney/Bowral
|
| Posted: Thu Mar 06, 2014 9:20 pm Post subject: |
|
|
| Quote: | | UK best source East Sussex Minors or Bull Motif. |
Here are Bull Motif's repair parts:
http://www.morrisminorspares.net/shop_item.php?ID=2816
Get plenty of practice with your welding first, to make sure that the expense of the panel pays off with a good result.
|
|
| Back to top |
|
Binda Blues
I've got trainer wheels
Joined: 21 Oct 2011
Posts: 19
Location: Brisbane
|
| Posted: Sat Mar 08, 2014 4:17 pm Post subject: |
|
|
Hi little Blue
Jimmy and Don are spot on. The replacement panel from ESM or Bull M are great to use. You have a nice straight section there to work with. I try to preserve the raised area around the external handle as much as possible. It seems you have a good 15 to 20 mm below this to align the new piece. As Jimmy said take your time with the welding, tacking and allowing to keep an acceptable temperature.
You will have the ability to dress the area up with body filler once the replacement panel is welded in place.
Your photos and work look great. Keep up the good work.
Tony
|
|
| Back to top |
|
LittleBlue
3rd gear
Joined: 08 May 2011
Posts: 71
Location: South Gippsland, Victoria.
|
|
| Back to top |
|
LittleBlue
3rd gear
Joined: 08 May 2011
Posts: 71
Location: South Gippsland, Victoria.
|
| Posted: Sun Mar 30, 2014 7:20 pm Post subject: |
|
|
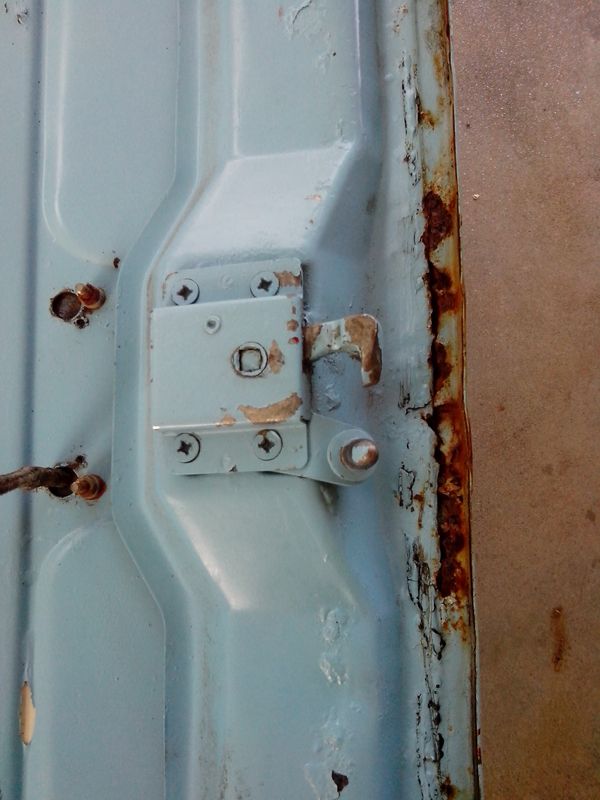
Pulled off the front passenger guard today. It revealed some nasty rust underneath (the panel between the guard and the door) That'll be easy enough to fix though.
Stripped the guard using a flap disc on a grinder (this does a great job, but is very time consuming and rough on the muscles!) and there was a bit of a surprise underneath. There is a large dint, about 30cm across, which was totally filled with bog, and a very bad repair in a very bad place. I will put up a picture tomorrow, but I think I may need a little advice with this one. I really hope that the rest of the car isn't quite so bogged up...
|
|
| Back to top |
|
Scouse
moderator

Joined: 15 Sep 2003
Posts: 5266
Location: Wollondilly, NSW
|
| Posted: Sun Mar 30, 2014 9:26 pm Post subject: |
|
|
| LittleBlue wrote: | Pulled off the front passenger guard today. It revealed some nasty rust underneath (the panel between the guard and the door) That'll be easy enough to fix though.
|
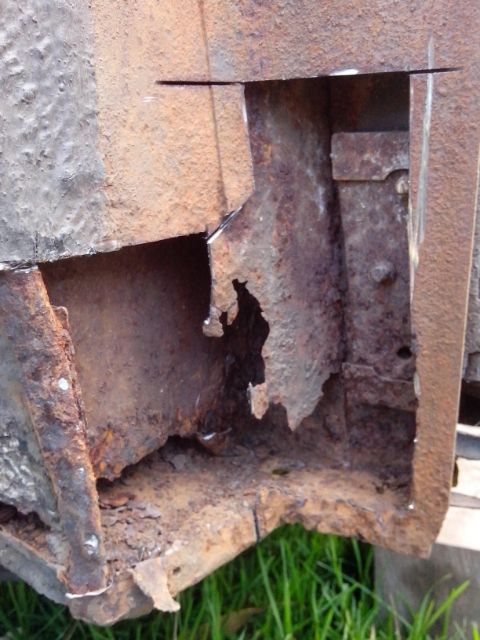
I assume you're talking about the A pillar which the door bolts onto.
Any rust here can't just be plated. There's quite a few panels that come together here & it's an important strength point in the body so they need to be sorted out before covering up the actual hole you see when removing the guard.
|
|
| Back to top |
|
LittleBlue
3rd gear
Joined: 08 May 2011
Posts: 71
Location: South Gippsland, Victoria.
|
|
| Back to top |
|
LittleBlue
3rd gear
Joined: 08 May 2011
Posts: 71
Location: South Gippsland, Victoria.
|
|
| Back to top |
|
Scouse
moderator
Joined: 15 Sep 2003
Posts: 5266
Location: Wollondilly, NSW
|
| Posted: Mon Mar 31, 2014 6:21 pm Post subject: |
|
|
| LittleBlue wrote: | This piece. What do you mean plated, Scouse? I was going to cut it out, clean the inside and maybe spray some fish oil/paint in there and weld in new metal. Would that be the best way, or is there a better way?
|
The lower sill panel/floor continues all the way forward in behind that rust hole. It's best to cut a large opening there so you can really see what's rusted out in there too.
Have a look here (yours will not be as bad hopefully):
http://www.mmoc.org.uk/viewtopic.php?f=28&t=30317&start=30
When you put the final outer plate on, don't forget to weld a couple of nuts behind the panel so you have something to bolt the guard to.
Last edited by Scouse on Tue Apr 01, 2014 3:51 am; edited 1 time in total |
|
| Back to top |
|
jimmy_d
Full Licence
Joined: 29 Aug 2009
Posts: 322
Location: Melbourne eastern suburbs
|
| Posted: Mon Mar 31, 2014 7:07 pm Post subject: |
|
|
| Honestly,I think your best option is to either source another guard or weld in a repair section for that specific area. I probably have an old guard that you could cut up for that piece if you were interested,I'll check it out if you are but you will have to take a lot of care and time to get the panel alignment right.
|
|
| Back to top |
|
DON58VAN
Full Licence
Joined: 25 Sep 2008
Posts: 863
Location: Sydney/Bowral
|
| Posted: Mon Mar 31, 2014 7:12 pm Post subject: |
|
|
Anna
The repair you are discussing with Scott (Scouse) is a common one.
I have just had it done professionally on my Traveller.
I am about to attempt to do it on my 2-door sedan.
Perhaps we can swap notes and photos on progress.
Cheers
Don
|
|
| Back to top |
|
brundahted
4th gear

Joined: 06 Sep 2012
Posts: 77
Location: Grenfell 2810
|
|
| Back to top |
|
LittleBlue
3rd gear
Joined: 08 May 2011
Posts: 71
Location: South Gippsland, Victoria.
|
|
| Back to top |
|
Monk
moderator

Joined: 13 Sep 2009
Posts: 671
Location: Canberra
|
|
| Back to top |
|
grant69
moderator

Joined: 27 Jan 2004
Posts: 2796
Location: Cairns Nth Qld
|
| Posted: Mon Apr 07, 2014 9:36 am Post subject: |
|
|
| Yeah I used to braze panels all the time, till the gas became too expensive, I have just bought a small set with disposable bottles, brazing is good because you can warm the whole area your working on so you get less warping and straighter flatter repairs needing less tidy up than with mig, you can also stretch and shrink with heat
|
|
| Back to top |
|
LittleBlue
3rd gear
Joined: 08 May 2011
Posts: 71
Location: South Gippsland, Victoria.
|
| Posted: Mon Apr 14, 2014 1:47 pm Post subject: |
|
|
Had another crack at it yesterday. That hole that was seen in the previous photo of this pillar... I shoved a screw driver in there and pulled out all the muck, then when we could see what was behind it, chopped into it. Underneath it looked like this. I'm unsure about this bit and how to fix it. I will probably need to buy the replacement panel, I am guessing? Should be fun to get in there and clean it out properly... I'll need to do extensive research on each of these bits to make sure I fully understand what to do, before diving in!
How's yours going, Don? 
 [img] [img]
I sort of came to the realisation when doing this bit, that being a coastal car for most of her life, she really is in need of a full overhaul. Looking inside the guts (under the outer panels) she's not in as good a nick as I thought she was. There are chunks of rust, weak metal and holes in places I've never looked. It's going to take an extensive amount of work I think... it's certainly not a panel by panel clean-up job... more of a gradual full-restoration. I'm still positive, but I think she will have to be taken off the road and done properly. I really need to be able to work on it slowly, rather than drive her all week, then pull bits off on the weekend and hope to make any progress.
So, I think she will be shedded and restored. I'm excited by this though... at least I can be sure to do the job properly with no time restraints![/img]
|
|
| Back to top |
|
grant69
moderator
Joined: 27 Jan 2004
Posts: 2796
Location: Cairns Nth Qld
|
| Posted: Mon Apr 14, 2014 2:19 pm Post subject: |
|
|
| I'd be getting some molasses and mixing with water so its runny and painting on all that rust on the inner panels, leave for 24hrs and hose off, will arrest the rust and stop it corroding further
|
|
| Back to top |
|
LittleBlue
3rd gear
Joined: 08 May 2011
Posts: 71
Location: South Gippsland, Victoria.
|
| Posted: Mon Apr 14, 2014 3:05 pm Post subject: |
|
|
| I will do that. Would you suggest cutting it out a bit further up, past the corrosion?
|
|
| Back to top |
|
Monk
moderator
Joined: 13 Sep 2009
Posts: 671
Location: Canberra
|
|
| Back to top |
|
LittleBlue
3rd gear
Joined: 08 May 2011
Posts: 71
Location: South Gippsland, Victoria.
|
|
| Back to top |
|
grant69
moderator
Joined: 27 Jan 2004
Posts: 2796
Location: Cairns Nth Qld
|
| Posted: Mon Apr 14, 2014 8:16 pm Post subject: |
|
|
| I would want to see a bit more just to make sure you've got it, but I have had great results with molasses. I normally brush it on but I have also used spray bottle, I normally leave it on 1-2 days but use your judgement if it needs more. I have used it in my early late teens to unseize an engine that had been left full of water, I filled the bores and left it abit more than a week, I drove that car renault 12 for about 3yrs with that engine with all the original parts. Here's a good youtube clip http://www.youtube.com/watch?v=KZCFcxf5IBw After stripping with molasses, I use fish oil (deodorised) on the bare panel until I need to paint them, wipe them down with metho to remove the fish oil. I have panels 10yrs plus covered in fish oil still as good as when I coated them
|
|
| Back to top |
|
LittleBlue
3rd gear
Joined: 08 May 2011
Posts: 71
Location: South Gippsland, Victoria.
|
|
| Back to top |
|
|


